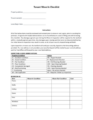
A Tenant Move In Checklist is a document that outlines the condition of the property before a tenant moves in. This checklist ensures that the property is in good condition for the tenant and that the tenant understands the landlord’s expectations for the property when moving out.
In some states, a landlord is required by law to provide a Move In Checklist before a tenant occupies the premises at the beginning of the lease.
| State | Requirement |
| Arizona | All New Tenancies |
| Connecticut | All New Tenancies [1] |
| Georgia | Only if Collecting a Security Deposit |
| Hawaii | All New Tenancies |
| Kansas | All New Tenancies |
| Kentucky | Only if Collecting a Security Deposit |
| Maryland | All New Tenancies |
| Massachusetts | Only if Collecting a Security Deposit |
| Michigan | Only if Collecting a Security Deposit |
| Montana | Only if Collecting a Security Deposit |
| Nevada | All New Tenancies |
| North Dakota | All New Tenancies |
| Virginia | All New Tenancies |
| Washington | Only if Collecting a Security Deposit |
| Wisconsin | Only if Collecting a Security Deposit |
A Move In Checklist should provide the following:
The Move In Checklist should contain a list of every single room and entryway in the rental unit. The checklist should contain a separate section for every area of the rental unit that the tenant will be responsible for. These include:
The number and types of sections listed will be dependent on the rental unit.
For each room on the checklist, it must list the items that will be inspected. These include:
In the template provided, some of the items will not be applicable for each room. When filling out the Move In Checklist, make sure that this is clearly noted to avoid any ambiguity.
When completing a Move In Checklist, follow these step-by-step instructions to make sure the entire process has been properly documented:
In some states, this checklist is required to be used during the Move Out Inspection. Even if not required, it will be useful to have when conducting the final inspection.
The Inspection may result in repairs and cleaning that the landlord must complete. It is the duty of the landlord to make sure any repairs or cleaning is properly completed and in a timely fashion. When a rental unit requires either repair or cleaning, the landlord should take the following steps:
Note: If the tenant has already moved in, schedule an agreed upon date and time in which the repair and/or cleaning will take place.
Generally, the checklist should be provided to the tenant at least one week before moving in. This will provide the tenant with enough time to review and understand their obligations before moving in. This will also provide the tenant and landlord an opportunity to review the condition of all items on the checklist before the lease begins.
After the initial inspection has been completed it is time for the tenant to move in. In some instances, a landlord will inspect the property about halfway through the tenancy to make sure there are no issues. Landlords that plan to do so can use our Landlord Inspection Checklist Template.
Unless there are problems along the way, the Move In Checklist can be filed away until it’s time for the tenant to vacate the premises and conduct a Move Out Inspection. If a tenant has moved in already without a checklist, you can use our Move Out Checklist when the time comes.
(a) As used in this section, “walk-through” means a joint physical inspection of the dwelling unit by the landlord and the tenant, or their designees, for the purpose of noting and listing any observed conditions within the dwelling unit. On and after January 1, 2024, upon or after the entry into a rental agreement but prior to the tenant’s occupancy of a dwelling unit, a landlord shall offer such tenant the opportunity to conduct a walk-through of the dwelling unit. If the tenant requests such a walk-through, the landlord and tenant, or their designees, shall use a copy of the preoccupancy walk-through checklist prepared by the Commissioner of Housing under subsection (c) of this section. The landlord and the tenant, or their designees, shall specifically note on the walk-through checklist any existing conditions, defects or damages to the dwelling unit present at the time of the walk-through. After the walk-through, the landlord and the tenant, or their designees, shall sign duplicate copies of the walkthrough checklist and each shall receive a copy. (b) Upon the tenant’s vacating of the dwelling unit, the landlord may not retain any part of the security deposit collected under chapter 831 of the general statutes or seek payment from the tenant for any condition, defect or damage that was noted in the preoccupancy walk-through checklist. Such walk-through checklist shall be admissible, subject to the rules of evidence, but shall not be conclusive, as evidence of the condition of the dwelling unit at the beginning of a tenant’s occupancy in any administrative or judicial proceeding. (c) Not later than December 1, 2023, the Commissioner of Housing shall (1) prepare a standardized preoccupancy walk-through checklist for any landlord and tenant to use to document the condition of any dwelling unit during a preoccupancy walk-through under subsection (a) of this section, and (2) make such checklist available on the Department of Housing’s Internet web site. (d) The provisions of this section shall not apply to any tenancy under a rental agreement entered into prior to January 1, 2024.